
A shanty house model is a miniature version of a simple, low-cost home that often uses mixed or recycled materials. People build these models for many reasons. Some make them for school projects, while others use them to learn about architecture, urban development, or social studies. Hobby crafters and diorama makers also enjoy this kind of project because it gives them a chance to build something detailed, realistic, and meaningful.
If you are wondering how to make a shanty house model, the good news is that it does not have to be expensive or complicated. In fact, one of the most interesting things about this model is that it looks best when it feels a little rough, uneven, and improvised. That means you do not need perfect cuts or polished surfaces. Instead, you need smart planning, careful layering, and attention to the little details that make the structure feel real.
Understanding a Shanty House Model
What Is a Shanty House Model?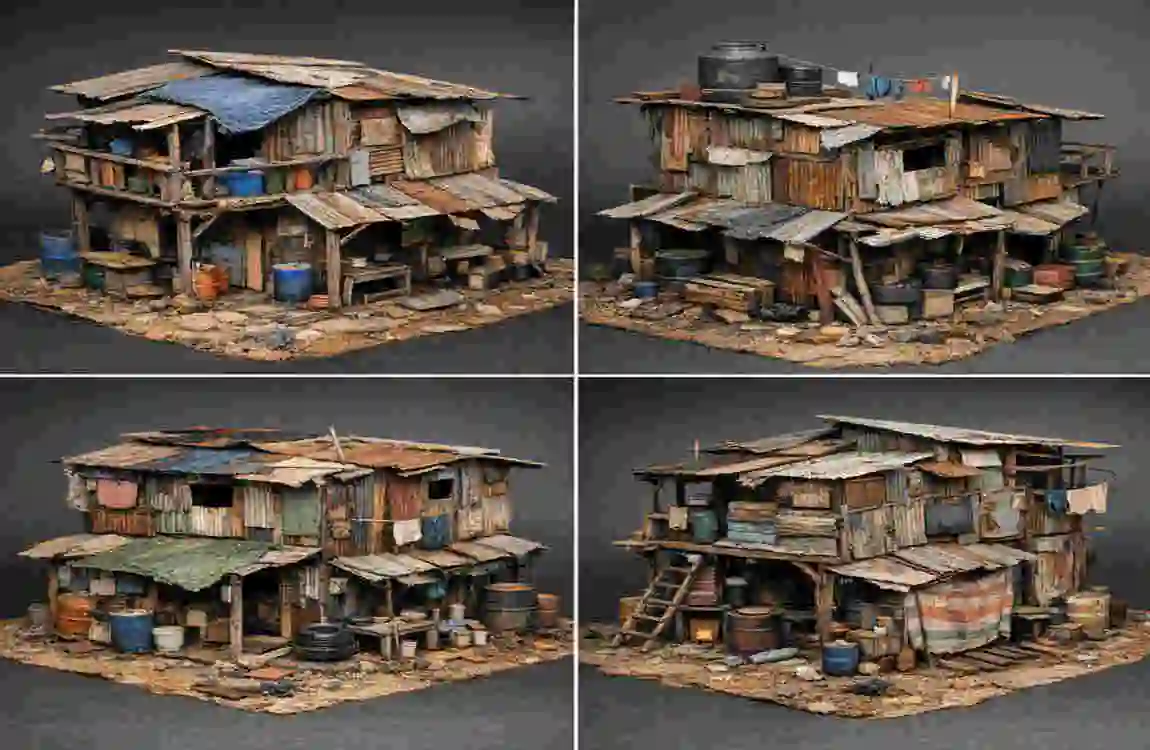
A shanty house is usually a small, simple home made from low-cost or reused materials. It may have wooden planks, metal sheets, cardboard-like walls, patched roofing, and other improvised parts. A shanty house model is a miniature version of this kind of structure.
The key idea is not to make the house look fancy. Instead, you want to show the building’s true character. That means uneven walls, patched roofs, rough textures, and simple construction. These details help the model tell a story.
A good shanty model often looks as if it were built with whatever materials were available. That is exactly what makes it interesting. The model should feel lived-in, weathered, and practical.
Real-Life Inspiration for Shanty Models
Before you start building, it helps to understand where this kind of house exists in real life. Shanty homes are often found in places where people build with limited resources or temporary materials. You may see them in:
- Rural settlements
- Urban informal housing areas
- Temporary shelter communities
- Coastal zones with weathered structures
- Low-income neighborhoods
- Construction areas used as temporary housing
Each of these settings has different visual features. A rural shanty may use more wood and natural materials. An urban one may include metal sheets, plastic coverings, and repaired walls. A coastal version may show rust, salt wear, and wind damage.
Looking at real-life examples helps you understand the small details that make the model believable. You are not just building a tiny house. You are showing a real environment with a story behind it.
Why Accuracy Matters in Model Making
When people build a model like this, they often focus on the overall shape. That is important, but accuracy matters as much. Accuracy does not mean making everything perfect. Instead, it means making the model faithfully reflect the real structure.
This is especially important for:
- Educational projects
- Architectural learning
- Diorama scenes
- Social studies presentations
- Creative art displays
A realistic model helps viewers better understand the space. They can see how the walls are made, how the roof is supported, and how the home fits into its environment. In that sense, the model becomes more than a craft project. It becomes a visual explanation.
Planning Your Shanty House Model Design
Choosing a Scale for Your Model
One of the first decisions you need to make is the scale. The scale tells you how much smaller your model will be compared to the real building. A good scale keeps everything looking balanced.
Here is a simple table to help you compare common scales:
ScaleBest ForLevel of DetailBeginner Friendly?
1:24 Larger display models High detail Medium
1:48 School projects and hobby models Balanced detail Yes
1:72 Small dioramas or compact scenes Moderate detail Yes
If you are starting, a 1:48 scale is often the easiest choice. It gives you enough room to show details without making the project too large. If your model is too small, tiny details become hard to build. If it is too large, the project may take too much time and material.
The scale you choose will affect every part of the project, including doors, windows, furniture, and even the figures around the house. So choose carefully and stay consistent.
Sketching Your Layout
Before cutting anything, draw a simple sketch of your model. This does not need to be an artistic masterpiece. A basic plan is enough. Your goal is to decide where the walls, roof, doors, and windows will go.
Think about these things:
- Is the house single-room or multi-room?
- Will the roof be slanted, flat, or patched?
- Will there be a small porch or side extension?
- Are the doors and windows placed evenly, or do they look irregular?
- Is the structure slightly crooked or worn down?
A shanty house often looks best when it is not perfectly symmetrical. Real houses like this are often built in stages. Owners add new parts over time so that the building may look patched or expanded.
You can also draw the surrounding area. A shanty house rarely sits alone in a blank space. It usually belongs to a bigger setting such as a dirt path, a crowded lane, or a small yard with buckets, fences, or laundry.
Gathering Visual References
If you want your model to look real, collect reference images before you begin. Look for:
- Photos of rural or urban informal homes
- Documentaries about housing or settlement areas
- Urban sketch drawings
- Online model-making examples
- Street view images from real neighborhoods
Try to notice patterns. What kind of roofing do these homes use? Are the walls made from wood, sheet metal, or mixed scraps? Are the windows uneven? Is the paint faded? Are there signs of repair?
Visual references help you avoid guesswork. They guide your design and save time later when you are building details.
Materials Needed for a Realistic Shanty House Model
Before you start, gather your materials in one place. Using the right supplies makes the process easier and the final result stronger.
Base Materials
The base is the foundation of your model. It should be strong enough to hold the house and the surrounding landscape.
Good base options include:
- Cardboard
- Foam board
- Wooden base
- MDF board
If you want a sturdy display piece, a wooden or MDF base is better. If you want a lighter project, foam board works well. Make sure the base is large enough for the house and the surrounding ground details.
Wall Materials
The walls of your model should look rough and layered. You can use more than one material to create variety.
Useful wall materials include:
- Corrugated cardboard for a tin-sheet effect
- Popsicle sticks for a wood-plank look
- Balsa wood sheets for thin structural pieces
- Thick paper or recycled packaging for patch sections
Using mixed materials gives the house a more natural look. A real shanty often has walls made from different things at different times, so variety adds realism.
Roofing Materials
The roof is one of the most visible parts of the model. It should look worn, patched, and practical.
Try these roofing materials:
- Aluminum foil
- Plastic sheets
- Recycled packaging
- Thin cardboard
- Textured paper
You can shape these materials into slanted or uneven roofs. If you want a tin-roof look, corrugated cardboard painted in metal tones can work very well.
Texture and Detailing Materials
Small textures make a big difference. They help the model feel like a real place.
Helpful texture materials include:
- Sand
- Soil
- Gravel
- Fabric scraps
- Twine
- Thread
- Jute rope
- Acrylic paints
You can use sand and soil to create a realistic ground. Fabric scraps can be made into tarps, curtains, or hanging cloth. Twine can work as clotheslines or ties for loose pieces. Paint brings everything together and helps create age and weathering effects.
Tools Required
You do not need expensive tools. A few basic ones are enough to make a strong model.
Quick Tool Checklist
- Craft knife
- Scissors
- Hot glue gun
- Ruler
- Measuring scale
- Paintbrushes
- Pencil
- Tweezers for small details
Keep your tools nearby before you begin. This saves time and helps you stay organized.
Step-by-Step Guide: How to Make a Shanty House Model
Now let’s move into the main process. If you want to make a shanty house model that feels realistic, follow these steps carefully.
Preparing the Base Structure
Start with a stable baseboard. This is the foundation of the whole scene, so it must be strong and level.
First, measure the area where your house will sit. Then lightly mark the layout with a pencil. You can outline the walls, the yard, and the surrounding ground. This helps you plan the space before you build.
Next, think about the ground texture. Real shanty homes are rarely built on smooth, clean surfaces. The ground may be rough, dusty, muddy, or uneven. So before adding the house, you may want to glue sand, soil, or textured paper onto the base.
This gives your model a natural setting. It also makes the house look like it belongs there instead of floating on a plain board.
Building the Frame
The frame is the skeleton of the house. It gives shape and support to the walls and roof.
You can build the frame using:
- Thin sticks
- Cardboard strips
- Balsa wood
- Popsicle sticks
Cut the frame pieces according to your scale. Make sure the main structure is balanced, but do not worry if it is not perfectly straight. A slight unevenness can actually make the model more believable.
Glue the frame carefully and let it dry fully before moving to the next step. If the frame is weak, the walls may lean or fall later.
Creating Walls
Walls are where the model starts to show personality.
Instead of using one smooth material, try mixing different textures. For example, one wall can use popsicle sticks, while another can use corrugated cardboard. You can even patch a section with paper or thin plastic to show repairs.
This is an important part of realism. Real shanty homes often develop over time. A wall may be replaced, covered, or reinforced with whatever material is available.
When building the walls:
- Leave small gaps in some places
- Add overlapping patches
- Keep the surface slightly uneven
- Avoid making the walls look too neat
These small imperfections help the house feel authentic. A perfect model house may look nice, but it will not capture the spirit of a shanty home as well.
Constructing the Roof
The roof can define the entire look of the model. A shanty roof often looks slanted, bent, or repaired in sections.
You can create the roof using corrugated cardboard, foil, or thin plastic. Layer the materials so the roof looks like it has been patched over time. If you want to create a more worn effect, bend one side slightly or make one edge lower than the other.
A realistic roof may include:
- Overlapping sheets
- Rust marks
- Torn corners
- Bent edges
- Uneven support lines
To make the roof look older, paint it in dull metal tones, dark brown, or faded gray. Add small rust effects with orange and brown shading. This gives the impression of long-term exposure to weather.
Adding Doors and Windows
Doors and windows help bring the structure to life. They also help you tell a story about the people who live there.
A shanty house door is often simple and handmade. You can build it from small wood strips or cardboard, then attach it in a slightly uneven way. It does not need to be fancy. In fact, a rough wooden door is more realistic.
For windows, use irregular placement if needed. Real homes like this may have windows that do not match perfectly. Some may be larger than others. Some may have plastic, cloth, or wire coverings instead of glass.
You can use transparent plastic to achieve a glass effect, but remember that many shanty homes use materials that are more practical than decorative. A window with no real glass can still look realistic if you detail it well.
Painting and Coloring
Painting is where the model gains its final mood. The right colors can turn a simple structure into a believable scene.
For a shanty house, choose earth tones and muted shades such as:
- Brown
- Gray
- Rust
- Dusty red
- Dull green
- Faded beige
- Blackened metal tones
Avoid bright colors unless you are showing a recently painted patch. Realistic models usually work better when the colors feel aged and faded.
You can use dry brushing to create worn edges and weathered spots. This technique is simple. Dip your brush lightly in paint, wipe most of it off, and gently brush the surface. The paint catches on raised areas, making the texture stand out.
You can also add thin washes of darker paint to bring out cracks, seams, and rough patches.
Adding Environmental Details
The surroundings are just as important as the house itself. Without them, the model may feel incomplete.
Add details like:
- Dirt paths
- Small stones
- Uneven ground
- Short fences
- Plastic barrels
- Buckets
- Laundry lines
- Broken crates
- Small plant patches
These extras make the model feel lived in. They suggest daily life and movement. A clothesline with tiny fabric scraps, for example, can tell the viewer that people live and work here.
You do not need to fill every space. Just add enough details to create a believable setting.
Final Realism Enhancements
This is the stage where you polish the model and add the final touches.
You can use:
- Cotton for smoke or dust effects
- Specks of paint for grime
- Moss or green texture for damp spots
- Loose paper scraps for clutter
- Thread for hanging wires
- Small bits of foil for reflective patches
These details should be subtle. Too much decoration can make the model feel crowded. The goal is to suggest a real place without overloading the scene.
Techniques for Making Your Shanty Model Look Realistic
Weathering Techniques
Weathering is the process of making new materials look old, damaged, or exposed to the environment. This is one of the most important parts of model making.
Use weathering to show:
- Scratches
- Peeling paint
- Rust
- Water stains
- Burn marks
- Dirty edges
- Sun-faded surfaces
You can create weathering with paint, dry brushing, smudging, and layering. A little damage goes a long way. Even a small rust streak or faded patch can completely change how the model feels.
Texture Layering
Texture layering means placing different materials on top of one another to create depth. This makes the model feel more real because real surfaces are rarely smooth and uniform.
For example:
- Glue paper over cardboard to create patchwork walls
- Add sand to the ground and paint over it
- Layer foil under paper to simulate bent metal
- Place fabric scraps over a roof edge like a loose tarp
When you layer textures, the model starts to feel handmade in the best way. It reflects the reality of homes that are built and repaired over time.
Color Theory for Realism
Color matters more than many beginners realize. A model can look flat if the colors are too bright or too clean.
For the most realistic result, use:
- Muted tones
- Earthy shades
- Faded colors
- Blended paint layers
Try not to use colors straight from the tube without adjusting them. Mix them with brown, gray, or black to dull them down. This helps the structure look older and more natural.
Think about how sunlight, rain, and dust affect color in real life. Everything fades and changes over time. Your model should show the same effect.
Common Mistakes to Avoid
Over-Perfect Construction
One of the biggest mistakes is making the model too neat. A shanty house should not look like a luxury miniature home.
If everything is perfectly aligned, the model loses realism. The walls should not all be the same height. The roof should not be too straight. The windows should not be placed with strict symmetry.
A little imperfection is not a flaw here. It is part of the design.
Using Too Few Materials
If you only use one material, the model may look flat and boring. Real shanties usually feature a variety of textures.
Mixing materials is important because it creates depth and variety. Use wood, cardboard, foil, fabric, and natural textures together whenever possible.
Ignoring Scale Consistency
Scale errors can make the whole model look strange. A door that is too tall, a window that is too large, or a fence that is out of proportion can ruin the effect.
Always measure carefully. Keep your doors, walls, rooflines, and extra items at the same scale. This helps the model stay believable.
Overcrowding the Model
It is tempting to add too many details, but more is not always better. Too much clutter can distract from the house itself.
Leave some space. Let the viewer’s eye rest. Balance detailed areas with simpler ones. That way, your model feels realistic without becoming messy.
Advanced Tips for Professional-Level Shanty Models
Adding Mini Human Figures
Small people figures can bring life to the model. They help the viewer understand the scale and the daily life around the house.
You can place figures:
- Standing near the door
- Carrying water
- Hanging clothes
- Sitting outside
- Talking near a fence
- Walking along a path
Make sure the figures match the model scale. If they are too large or too small, the scene will feel off. Their positions should also tell a story.
Creating a Story Scene
A strong model often tells a story without using words. You can create a scene that suggests daily life.
For example:
- A family preparing food outside
- A child playing near the doorway
- A person repairing the roof
- Laundry hanging in the sun
- Market items are placed nearby
These small scenes give the model purpose. They make the viewer pause and think about the people who live there.
Lighting Effects
Lighting can transform a simple model into a dramatic display.
You can add:
- Warm LED lights inside the house
- Soft light near the doorway
- Shadows under the roof
- Glow effects through small windows
Lighting works especially well if your shanty house model is part of a larger diorama. It adds depth and warmth, and it makes the structure feel occupied.
Environmental Context
The setting around the house should match the story you want to tell.
A rural shanty may have dirt roads, trees, and farming tools nearby. An urban shanty may have tighter spaces, more clutter, and neighboring structures close together. A coastal shelter may show salt damage, sand, and weathered metal.
Context matters because it helps the viewer understand why the house looks the way it does. The environment is part of the design, not just background decoration.
Educational Use of Shanty House Models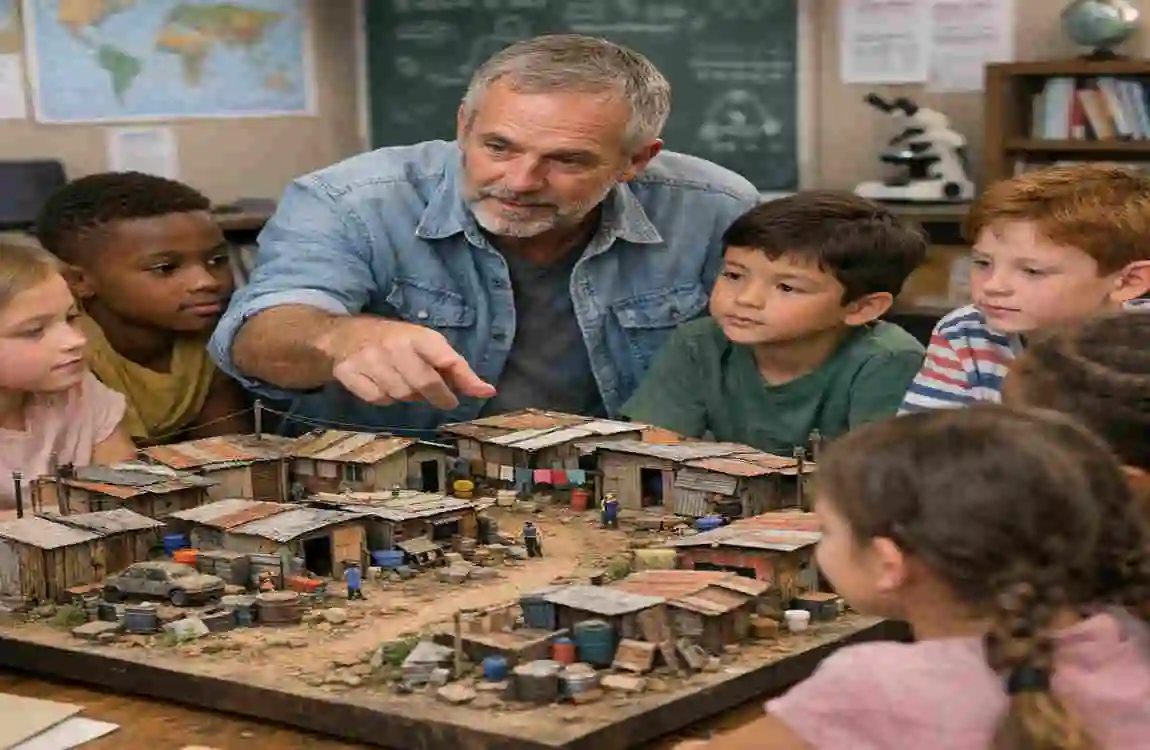
In Architecture Studies
Shanty house models are useful in architecture because they show how people build with limited resources. They help learners understand:
- Material constraints
- Space efficiency
- Structural weakness
- Adaptation over time
- Informal building methods
This kind of model can also show the difference between planned housing and improvised housing. That comparison is valuable for students who want to understand real-world design challenges.
In School Projects
Many students build these models for school presentations. They may use them in:
- Geography
- Social studies
- Civic education
- Environmental studies
- Community development topics
A model like this can help explain urban growth, poverty, housing conditions, or population changes. It makes abstract ideas easier to see and understand.
In Art and Diorama Projects
Artists and hobbyists often use shanty house models in dioramas. These scenes can show real life, social issues, or imagined worlds.
A model can tell a story about:
- Survival
- Family life
- Community
- Hardship
- Resourcefulness
That is what makes this project special. It is not only about building a miniature house. It is about creating a scene that speaks to people.
Maintenance and Display Tips
Protecting Your Model
After you finish your model, you will want to keep it safe. Dust, moisture, and sunlight can damage delicate parts over time.
To protect it:
- Store it in a display case
- Keep it away from direct sunlight
- Avoid humid areas
- Use a soft brush to remove dust gently
- Handle it by the base, not the roof or walls
If your model includes paper, fabric, or foam, it may be especially sensitive. A cover or clear case can help it last much longer.
Transportation Tips
If you need to move the model, be careful. Tiny pieces can break easily.
Before transport:
- Reinforce weak spots with extra glue
- Remove loose items if possible
- Place soft padding around the base
- Carry the model with both hands
- Keep it level while moving
A little preparation can save a lot of repair work later.
FAQs – How to Make a Shanty House Model
What materials are best for beginners?
For beginners, cardboard, glue, basic paint, and simple sticks are great choices. These materials are easy to cut, cheap to find, and good for practicing basic construction.
How long does it take to build a shanty house model?
Most models take about 3 to 7 days, depending on the size and level of detail. A simple school project may finish faster, while a detailed diorama can take longer.
Can I use recycled materials?
Yes, and you absolutely should if you can. Recycled materials often make the model look more realistic because they already have texture, wear, and variation. Old packaging, scraps, and leftover craft items can be very useful.
What scale is easiest for beginners?
The 1:48 scale is often the easiest for beginners. It is large enough to add detail but not so large that it becomes hard to manage.
How do I make it look more realistic?
Focus on weathering, texture, color variation, and small imperfections. Realism comes from little details, not from making the model look perfect.
| Step | What to Do | Materials Needed | Tips for Realism |
|---|---|---|---|
| Planning | Sketch a basic shanty house design (small, simple structure) | Paper, pencil | Keep design uneven and simple for realism |
| Base Structure | Build the frame of the house | Cardboard, foam board, thin wood sticks | Make it slightly irregular, not perfectly straight |
| Walls | Create rough walls using scrap materials | Cardboard, corrugated paper, matchsticks | Mix materials to mimic reused construction |
| Roof | Build a slanted or patched roof | Plastic sheets, cardboard, fabric scraps | Add patchwork look (uneven roofing) |
| Texturing | Add worn and rough surfaces | Sandpaper, paint, glue, fabric pieces | Use dull, faded colors like brown, gray, rust |
| Details | Add doors, windows, small objects | Bottle caps, paper, sticks | Make windows uneven or slightly broken |
| Environment | Create surrounding area | Sand, soil, small stones | Add clutter, uneven ground, and debris |
| Finishing Touch | Paint and weathering effects | Acrylic paint, dry brush | Add stains, cracks, and dirt effects |