
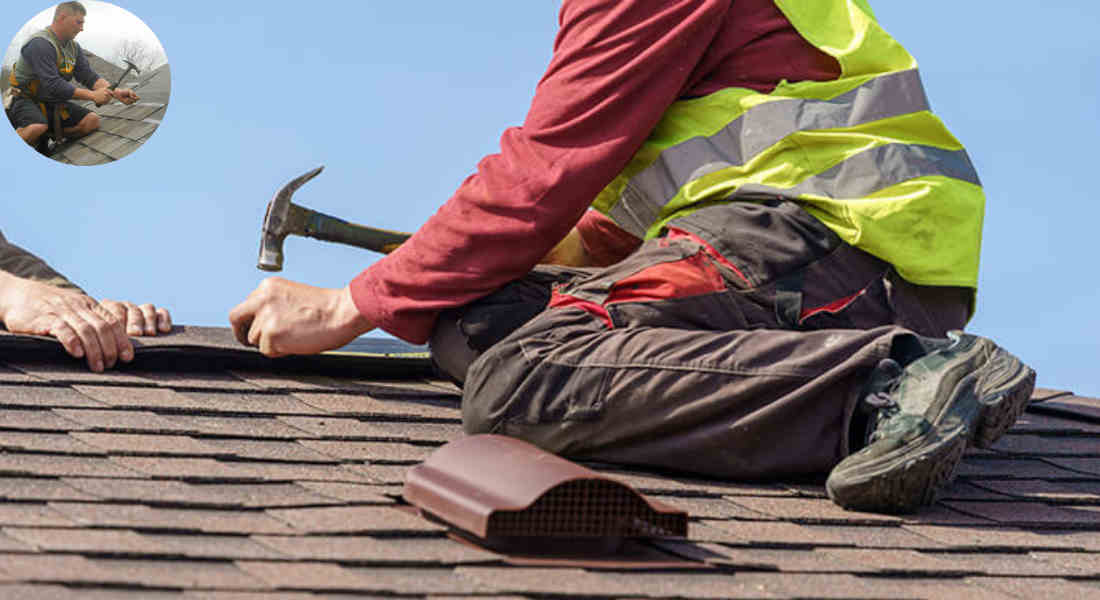
When it comes to home roofing, having the right tools can make all the difference. Proper tools not only enhance the quality of the work but also improve safety and efficiency. One tool that stands out in the roofing industry is the shingling hammer. This specialized tool is designed specifically for roofing tasks, making it an ideal choice for both professionals and DIY enthusiasts.
We’ll delve into the unique features of this tool, its numerous benefits, and how to utilize it effectively for your roofing projects. Whether you’re new to roofing or looking to upgrade your toolkit, this guide will provide valuable insights into the world of shingling hammers.
What is a Shingling Hammer?

Definition and Description
A shingling hammer, often referred to as a roofing hammer or hatchet, is a specialized tool designed for installing shingles on roofs. Unlike regular hammers, which are primarily used for general purposes, a shingling hammer combines multiple functions tailored for roofing tasks.
Comparison with Regular Hammers and Roofing Nail Guns
While regular hammers are great for general carpentry, they lack the specific features that make a shingling hammer ideal for roofing. Roofing nail guns are faster but can be cumbersome and require a power source. The shingling hammer strikes a balance between efficiency and precision, making it a popular choice among roofing professionals.
Design and Components
Typically, a shingling hammer features:
- Flat Face: For driving nails evenly into shingles.
- Claw: Used for removing nails or adjusting shingles.
- Hatchet Blade: Ideal for cutting shingles to size.
This multifunctional design allows roofers to perform various tasks without switching tools, which can be a significant time-saver.
Multifunctionality in Roofing Tasks
The shingling hammer excels in versatility, allowing users to drive nails, cut shingles, and ensure proper spacing—all with one tool. This functionality simplifies the roofing process and contributes to a more efficient workflow.
Unique Features That Make a Shingling Hammer Ideal for Home Roofing
Built-in Shingle Gauge
One standout feature of a shingling hammer is the built-in shingle gauge. This component ensures consistent shingle spacing and exposure, which is crucial for achieving a uniform appearance and effective water shedding. Proper spacing not only enhances the aesthetic appeal of the roof but also prevents leaks and other issues.
You may also read (understanding roof insurance for homes over 20 years old).
Magnetic Nail Holder
Another remarkable feature is the magnetic nail holder. This innovation allows for one-handed nail placement, which is particularly advantageous when working on steep roofs. It enhances safety by minimizing the need to fumble with nails and speeds up the installation process.
Dual Functionality: Hammer and Hatchet Blade
The combination of a hammer and hatchet blade in one tool is a game-changer. Roofers can drive nails and cut shingles without needing to switch tools, which improves efficiency and reduces the time spent on the job.
Ergonomic Design and Grip
An ergonomic design is crucial in reducing hand fatigue, particularly during prolonged roofing projects. Many shingling hammers come equipped with rubber grips and a balanced weight distribution. This helps minimize vibrations, making the tool easier to handle and ultimately leading to a more comfortable user experience.
Angled Striking Face
The angled striking face of a shingling hammer is designed for flush contact on sloped surfaces. This feature ensures that nails are driven at the correct angle, contributing to the durability of the roof and preventing potential damage over time.
Benefits of Using a Shingling Hammer for Home Roofing Work
Precision and Accuracy
Using a shingling hammer significantly enhances the precision and accuracy of nail placement. The built-in gauge and magnetic nail holder work together to ensure that each nail is positioned correctly, reducing the risk of roofing errors that could lead to leaks or structural issues.
Increased Efficiency and Speed
Combining multiple functions in one tool allows roofers to complete their work more efficiently. The time saved by not having to switch tools can be substantial, making the shingling hammer a crucial asset for busy roofing professionals.
Durability and Longevity
Quality matters when it comes to tools. A well-made shingling hammer, such as those from Estwing or Stanley, is typically constructed from high-quality forged steel. This durability ensures that the tool can withstand the rigors of roofing work and resist wear and tear on tough materials.
Safety Advantages
Safety is paramount in roofing. The ergonomic design of a shingling hammer reduces hand fatigue and the risk of vibration-related injuries. Additionally, the magnetic nail holder enables safer handling of nails, particularly on steep or uneven surfaces.
Cost-Effectiveness
Investing in a specialized tool, such as a shingling hammer, can be cost-effective in the long run. By reducing the need for multiple tools and minimizing the risk of costly roofing errors, homeowners and professionals alike can save money on both tools and repairs.
How to Choose the Right Shingling Hammer for Your Home Roofing Project

Factors to Consider
When selecting a shingling hammer, it’s essential to consider the following factors:
- Weight: A lighter hammer may reduce fatigue, while a heavier one can drive nails more effectively.
- Handle Material: Look for hammers with durable handles, such as fiberglass or steel, which offer better shock absorption.
- Grip Comfort: Ensure the hammer has a comfortable grip to prevent slipping during use.
- Blade Type: Choose a blade that suits your specific roofing materials—some blades are better for asphalt shingles, while others work well with wood.
Recommended Brands and Models
Some popular and reliable brands include:
- Estwing 28 oz Shingler’s Hammer: Renowned for its durability and balance.
- Stanley FatMax: Known for its ergonomic design and versatility.
Importance of Adjustable Shingle Gauge
An adjustable shingle gauge is a crucial feature that allows you to accommodate various shingle exposures. This flexibility ensures that your roofing work meets industry standards and looks great.
You may also read (are ants good for the house garden uk).
Tips for Testing the Hammer’s Balance and Comfort
Before making a purchase, it’s wise to test the hammer. Hold it in your hand to assess its balance and comfort. A well-balanced hammer will feel natural and easy to handle, making it a joy to use on the job.
How to Use a Shingling Hammer Effectively
Step-by-Step Guide
Using a shingling hammer effectively involves a few key steps:
- Driving Nails: Position the nail on the shingle, using the magnetic holder to keep it in place. Aim for the center of the shingle and strike with controlled force.
- Cutting Shingles: Use the hatchet blade to cut shingles to size. Ensure your cuts are straight for a clean, finished look.
- Maintaining Spacing: Use the built-in shingle gauge to maintain consistent spacing between shingles. This will help prevent leaks and ensure a uniform look.
- Safety Tips: Always wear safety goggles when working on roofs. Ensure your footing is secure, and consider using a harness when working on steep slopes.
Common Mistakes to Avoid When Using a Shingling Hammer
Improper Nail Placement
One common mistake is improper nail placement, which can compromise the roof’s integrity. Always ensure nails are driven at the correct angle and positioned correctly.
Overlooking Ergonomic Factors
Neglecting ergonomic design can lead to hand fatigue and injuries. Always choose a hammer that feels comfortable in your hand and minimizes vibrations.
Using the Wrong Hammer
Using a regular hammer or an inappropriate tool can lead to inefficiencies and potential damage. Stick with a shingling hammer for roofing tasks.
Neglecting Tool Maintenance
Regular maintenance is crucial. Ensure the blade is sharp and the hammer is clean to avoid performance issues.
You may also read (can water spraying lower your home stemperature)