
Hey there, fellow homeowner! Have you ever found yourself staring at a leaky roof, wondering how to fix it without breaking the bank? Well, you’re in luck—we’re diving into the world of roof tar and its drying times today.
What Is Roof Tar and Why Is It Used?
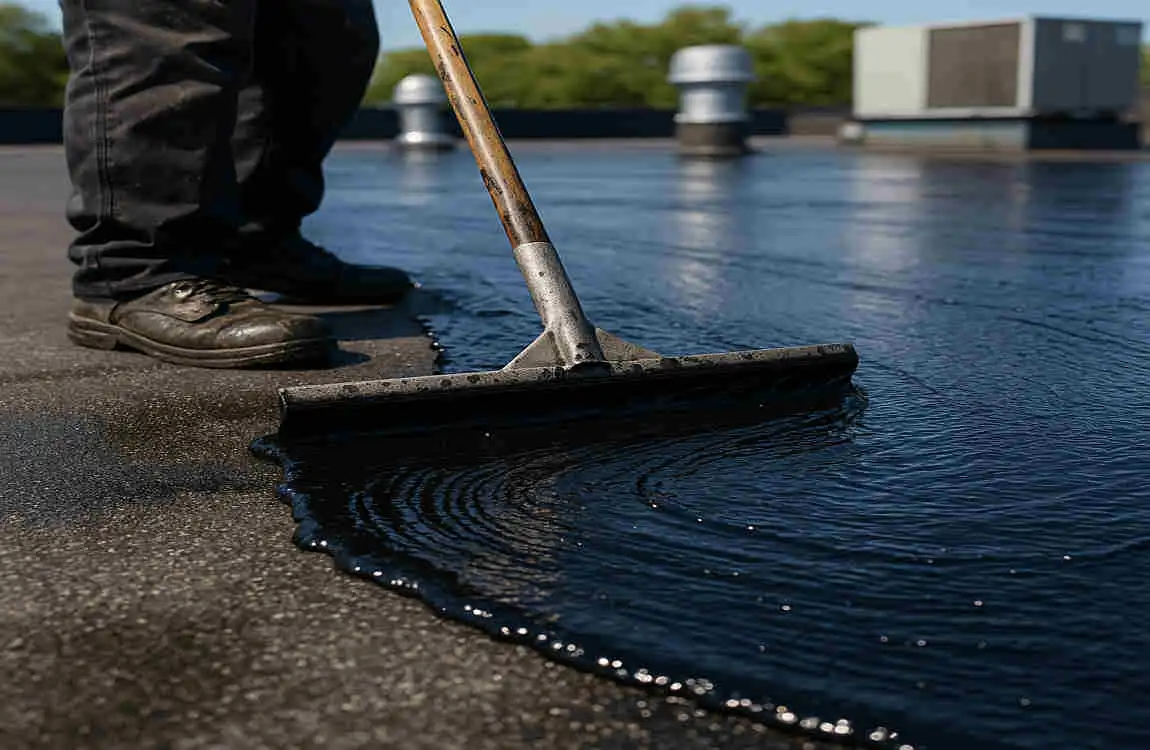
What Exactly Is Roof Tar?
Roof tar, also known as asphalt or bitumen, is a thick, black liquid derived from petroleum. It’s a popular choice for roofing repairs and sealing because of its durability and affordability.
Benefits of Using Roof Tar
- Affordability: Roof tar is often more budget-friendly than other roofing materials.
- Durability: When applied correctly, roof tar can last for many years, protecting your roof from the elements.
- Versatility: Roof tar can be used on various roof types, including flat and low-sloped roofs.
When Is Roof Tar Typically Used?
Roof tar is commonly applied in the following scenarios:
- Repairing small leaks or cracks
- Sealing around chimneys, vents, and skylights
- Creating a waterproof barrier on flat roofs
How Does Roof Tar Protect Your Roof?
Roof tar acts as a protective barrier, preventing water from seeping into your home. It’s especially effective at keeping out moisture, which can lead to mold, rot, and structural damage if left unchecked.
Factors Affecting How Long Roof Tar Takes to Dry
Typical Drying Time Range
On average, roof tar takes 24 to 72 hours to dry completely. However, this timeframe can vary depending on several factors.
Key Factors Influencing Drying Time
Weather Conditions
- Temperature: Warmer temperatures can speed up the drying process, while colder temperatures may slow it down.
- Humidity: High humidity levels can prolong drying times by preventing the tar from evaporating.
- Wind: Gentle breezes can help the tar dry faster by promoting air circulation.
- Sunlight Exposure: Direct sunlight can accelerate drying, but be cautious not to overheat the tar.
Application Thickness
- Thin Layers: Applying roof tar in thin layers can help it dry more quickly.
- Thick Layers: Thicker applications may take longer to dry, as the tar needs more time to evaporate.
Type of Roof Tar Used
- Quick-Drying Roof Tar: Some products are specifically designed to dry faster than traditional roof tar.
- Traditional Roof Tar: Standard roof tar may take longer to dry, but it can still be effective when applied correctly.
Surface Conditions
- Clean, Dry Surfaces: Applying roof tar to a clean, dry surface can help it adhere better and dry more quickly.
- Wet Surfaces: If the surface is wet, the roof tar may take longer to dry and may not adhere as well.
Environmental Impact
- Altitude: Higher altitudes can affect drying times due to differences in air pressure and temperature.
- Pollution and Air Quality: Poor air quality or high levels of pollution can slow down the drying process.
Standard Drying Times for Different Types of Roof Tar
Comparison of Common Types
Type of Roof Estimated Drying Time
Cold-Applied Roof Tar 24-48 hours
Hot-Applied Roof Tar 48-72 hours
Asphalt-Based Tar 24-72 hours
Synthetic Roof Tar Products 12-24 hours
Curing vs. Drying Time
It’s important to note that drying time and curing time are not the same. Drying time refers to when the surface of the roof tar is no longer tacky, while curing time is when the tar has fully hardened and reached its maximum strength. Curing can take several days or even weeks, depending on the type of roof tar used.
Step-by-Step Guide: How to Apply Roof Tar Correctly
Preparing the Roof Surface
Before applying roof tar, make sure to:
- Clean the surface thoroughly to remove dirt, debris, and any old roofing material.
- Allow the surface to dry completely before applying the tar.
- Repair any cracks or damage to the roof to ensure a smooth, even surface.
Tools and Safety Equipment Needed
- Roof tar
- Trowel or brush for application
- Safety goggles
- Gloves
- Ladder or scaffolding (if needed)
Proper Application Techniques
- Start by applying a thin, even layer of roof tar to the entire area you wish to seal or repair.
- Use a trowel or brush to spread the tar smoothly and evenly.
- If necessary, apply additional layers, allowing each layer to dry before adding the next.
Recommended Layer Thickness
For optimal drying time, aim for a layer thickness of about 1/8 inch (3 mm). Thicker layers may take longer to dry, leading to uneven drying or cracking.
Tips to Avoid Common Mistakes
- Avoid applying roof tar in direct sunlight, as it can cause the tar to overheat and bubble.
- Don’t apply too thick a layer, as this can lead to uneven drying and cracking.
- Make sure to clean up any spills or drips immediately to prevent staining or damage to surrounding areas.
How to Tell When Roof Tar Is Fully Dry and Ready

Signs of Dry Roof Tar
- Texture: Dry roof tar will have a smooth, non-tacky feel.
- Color Change: Some types of roof tar may darken slightly as they dry.
- Hardness: Fully dry roof tar will be firm to the touch and resistant to pressure.
Methods for Testing Dryness
- Touch Test: Gently press your finger against the surface of the roof tar. If it feels dry and doesn’t stick to your finger, it’s likely ready.
- Foot Traffic Test: If you need to walk on the roof, wait until the tar is completely dry and firm before doing so.
Consequences of Premature Disturbance
If you disturb or apply additional layers to the roof tar before it’s scorched, you risk:
- Damaging the surface of the tar
- Creating uneven drying or cracking
- Reducing the effectiveness of the seal or repair
Tips for Speeding Up Roof Tar Drying Time
Best Weather Conditions
- Aim for warm, dry weather with low humidity for the fastest drying times.
- Avoid applying roof tar before expected rain or high humidity, as this can prolong drying times.
Use of Fans or Heaters
If you need to speed up the drying process, consider using fans or heaters to promote air circulation and warmth. However, be cautious not to overheat the tar, as this can cause bubbling or damage.
Keeping the Area Well-Ventilated
Ensure good air flow around the treated area to help the roof tar dry more quickly. Open windows or use fans to promote ventilation if working indoors.
Common Problems Linked to Roof Tar Drying Delays and How to Avoid Them
Issues with Drying
- Tackiness: If the roof tar remains sticky or tacky for an extended period, it may not be drying properly.
- Uneven Drying: Some areas may dry faster than others, leading to an uneven surface.
- Cracking and Peeling: Improper drying can cause the roof tar to crack or peel away from the surface.
Impact on Roof Integrity
Improper drying can compromise the effectiveness of the roof tar, leading to:
- Leaks or water damage
- Reduced the lifespan of the repair or seal
- Increased risk of mold or rot
Solutions for Drying-Related Problems
- If the roof tar remains tacky, allow it to dry longer or consider using a different product.
- For uneven drying, apply additional thin layers to even out the surface.
- If cracking or peeling occurs, remove the affected area and reapply the roof tar correctly.
Maintenance After Roof Tar Application
Inspecting Roof Tar Repairs
- Inspect your roof tar repairs at least once a year, or more frequently if you notice any issues.
- Look for cracks, peeling, or other damage to the tar.
Extending the Life of Roof Tar
- Keep your roof clean and free of debris to prevent damage to the tar.
- Address any leaks or damage promptly to prevent further issues.
- Consider applying a protective coating to the roof tar to extend its lifespan.
When to Reapply or Replace Roof Tar
- If you notice significant damage or deterioration to the roof tar, it may be time to reapply or replace it.
- Depending on the type of roof tar used and the conditions it’s exposed to, you may need to reapply every 5-10 years.
When to Call a Professional
Situations Requiring Professional Help
- If you’re unsure about how to properly apply or maintain roof tar
- If you have a large or complex roofing project
- If you notice significant damage or leaks that you’re not comfortable addressing yourself
Benefits of Hiring a Roofing Expert
- Professional roofers have the knowledge and experience to apply roof tar correctly
- They can identify and address any underlying issues with your roof
- Hiring a professional can save you time and money in the long run by ensuring the job is done right
Cost Considerations and Choosing a Reliable Contractor
- The cost of hiring a professional will vary depending on the size and complexity of your project
- When choosing a contractor, look for someone with experience, good reviews, and proper licensing and insurance
- Don’t be afraid to ask for multiple quotes and references before making a decision