
Adding a cupola to your home is more than just a decorative enhancement—it’s a practical and aesthetic upgrade that combines functionality with timeless charm. Whether you’re looking to boost ventilation or add architectural interest, mounting a cupola on your metal roof can make a striking difference.
Understanding Cupolas and Metal Roofs
Before diving into the installation process, it’s essential to understand the basics of cupolas and why they require special considerations when paired with metal roofs.
What Is a Cupola?
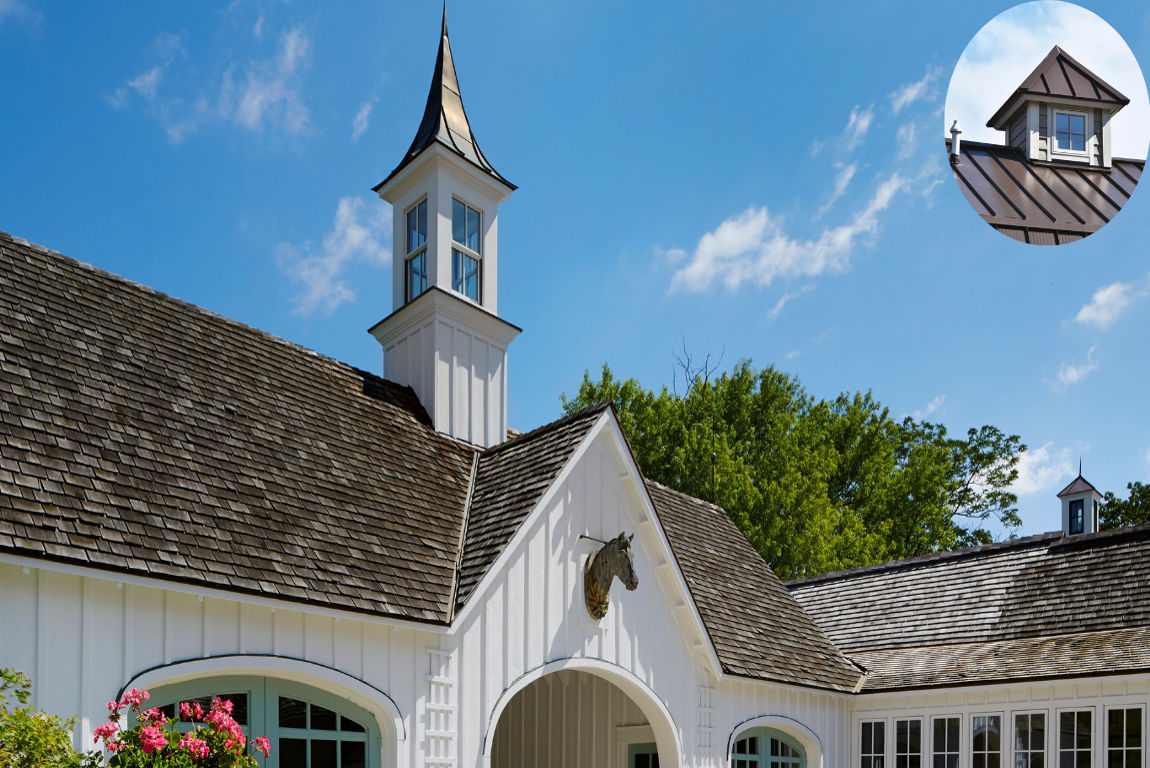
A cupola is a small structure that sits atop a roof, traditionally designed to provide ventilation and add architectural flair. They often feature louvres, windows, or domes and can be found on barns, homes, and even commercial buildings.
The primary purposes of a cupola include:
- Ventilation: Cupolas help release hot air and moisture from attics, improving airflow.
- Aesthetic Appeal: They add a classic, eye-catching feature to any roofline.
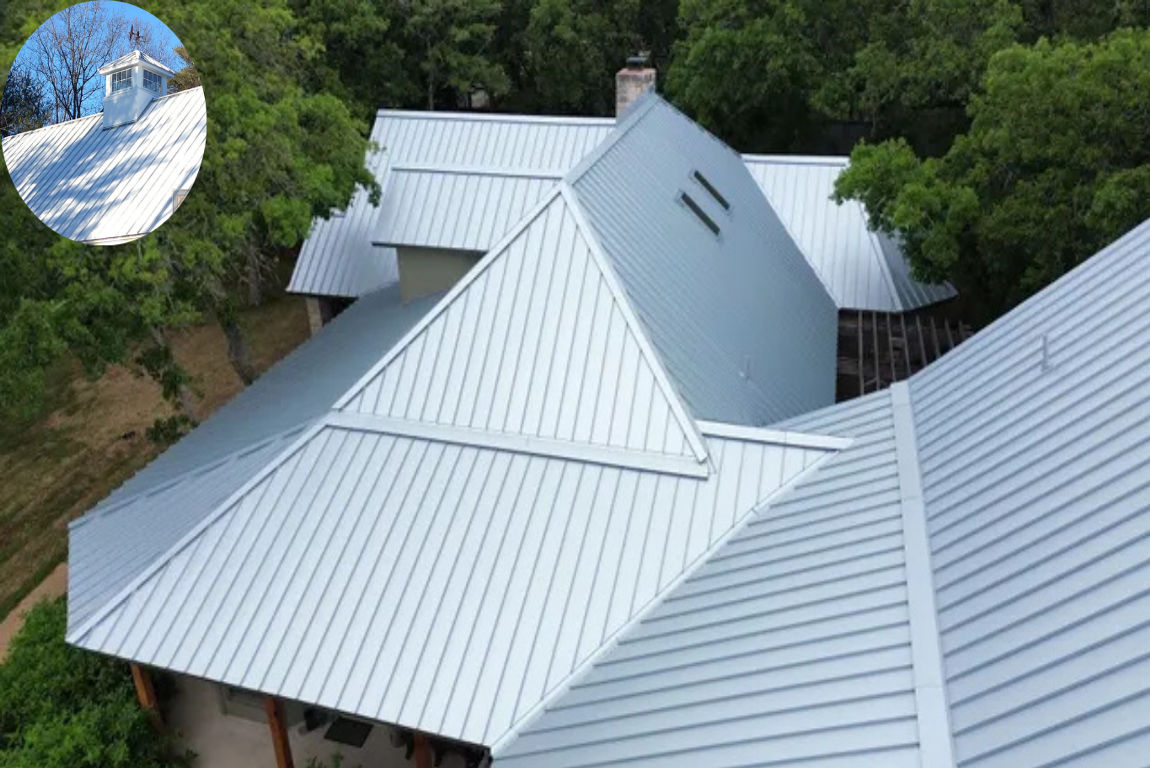
Why Metal Roofs Require Special Considerations
Metal roofs are durable and visually appealing, but they require specific techniques and materials for cupola installation. Unlike traditional shingle roofs, metal roofs are lighter and less forgiving of improper installations, which can lead to leaks or structural damage. Key factors include:
- Durability: Metal roofs expand and contract with temperature changes, requiring flexible materials and secure mounting.
- Weather Resistance: Proper sealing is essential to prevent leaks and ensure the product’s longevity.
Installing the cupola correctly ensures it complements the roof’s durability and withstands weather conditions.
Preparing for Installation: Key Considerations
Proper preparation is the foundation of a successful installation. Rushing into the project without planning can lead to costly mistakes.
You may also read (mastering the art of cutting polycarbonate sheets at home).
Measuring Your Metal Roof Pitch
Your roof’s pitch determines the angle at which the cupola will sit, so accurate measurement is critical. The pitch is usually expressed as a ratio (e.g., 6:12), indicating how many inches the roof rises per 12 inches of horizontal distance.
- Use a pitch gauge or a smartphone app to measure the slope accurately.
- The cupola base must match the pitch to ensure a snug, secure fit.
Selecting the Right Size Cupola
Choosing the right size cupola is both an aesthetic and functional decision. A general rule of thumb is to select a cupola that is 1 inch wide for every foot of roof width. For example:
- A roof that is 24 feet wide would require a 24-inch wide cupola.
Tools and Materials Needed
Before starting, gather the following tools and materials:
- Tools: Jigsaw, drill, screwdriver, measuring tape, chalk-line tool
- Materials: Non-ferrous screws, plywood or framing lumber, flashing, caulk, roofing sealant
Safety Precautions
Working on a roof can be dangerous, especially on slippery metal surfaces. Follow these safety tips:
- Use a harness or safety rope.
- Wear non-slip footwear.
- Avoid working during wet or windy conditions.
Installing the cupola before adding ridge caps or vents simplifies the process. If your roof already has these elements, they may need to be removed temporarily.
Marking and Cutting the Roof Opening
Once you’ve prepared your materials, it’s time to mark and cut the roof opening where the cupola will sit.
Finding the Center of the Roof
Locate the centre of your roof to ensure the cupola is perfectly aligned with it. Steps include:
- Measure the width of the roof at the ridge.
- Divide the measurement by two to find the centre point.
- Mark this point with chalk or a marker.
Outlining the Cupola Base
Place the cupola base on the roof and trace its outline using chalk. Ensure the base is aligned with the roof centre for a symmetrical appearance.
Cutting the Roof Opening
Using appropriate tools, carefully cut the outlined area:
- A jigsaw with a metal-cutting blade works well for this step.
- Be cautious not to damage the roof’s structural framing members.
Installing Step Flashing
Step flashing is crucial in preventing water leaks. Install flashing around the opening, overlapping it with the roof panels for effective waterproofing.
Building and Securing the Cupola Base
The base of the cupola serves as the foundation for the entire structure, so it must be sturdy and securely in place.
Constructing the Platform
Build a platform with framing lumber or plywood. This platform reinforces the cupola’s stability and provides a flat surface for mounting.
Securing the Base to the Roof
Attach the base to the roof’s structural framing members (ridge or rafters) using non-ferrous screws or nails. These materials resist corrosion, ensuring durability over time.
You may also read (the impact of digging on your home gardens health).
For larger cupolas (36 inches or more), consider adding:
- Internal supports: Reinforce the base with additional wood to improve wind resistance.
- Curbing: Create a raised border at the base to enhance stability.
Applying Flashing and Sealing
Seal the base with flashing and apply caulk along all edges. This step prevents water infiltration and ensures the cupola is securely integrated into the roof.
Assembling the Cupola
Now that the base is installed, it’s time to assemble the cupola itself.
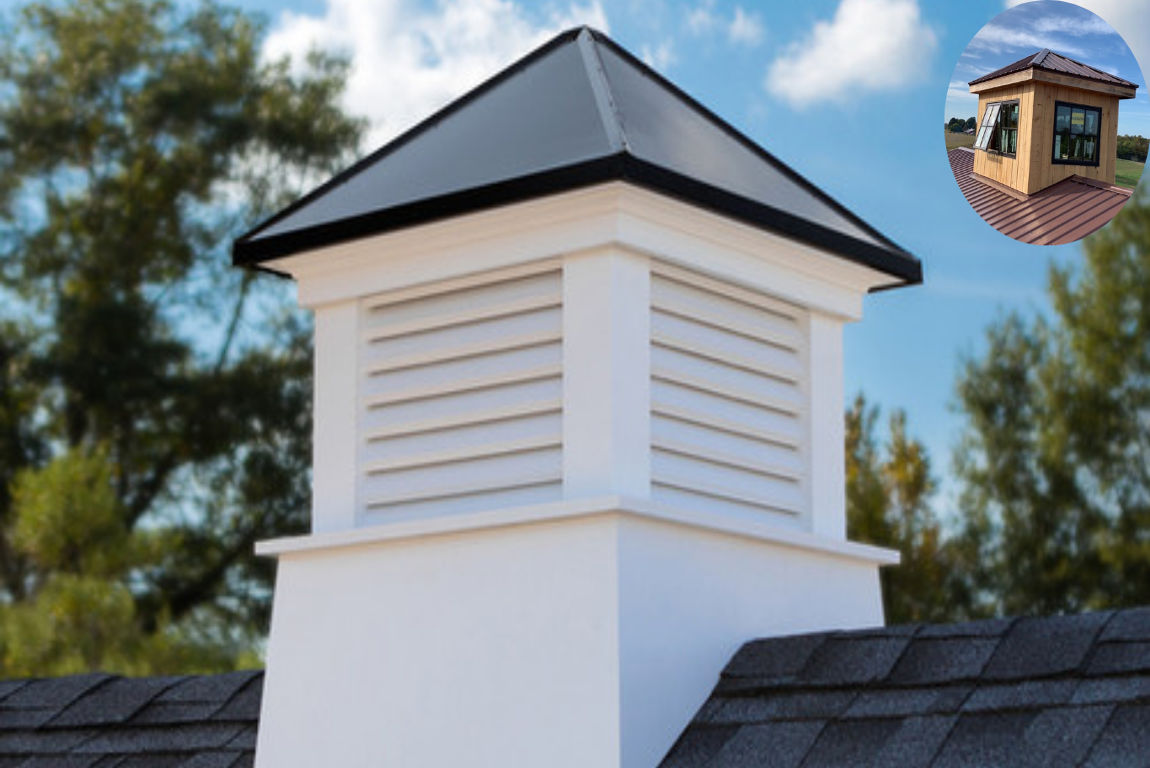
Modular Components of a Cupola
Most cupolas are sold in modular sections:
- Base: The foundation that sits on the roof.
- Midsection: Often includes louvres or panels for ventilation.
- Roof: The decorative top, sometimes capped with a finial.
Step-by-Step Assembly
- Attach the Midsection: Secure the midsection to the base using pre-drilled holes and screws.
- Install Louvers or Panels: Ensure proper alignment for optimal airflow.
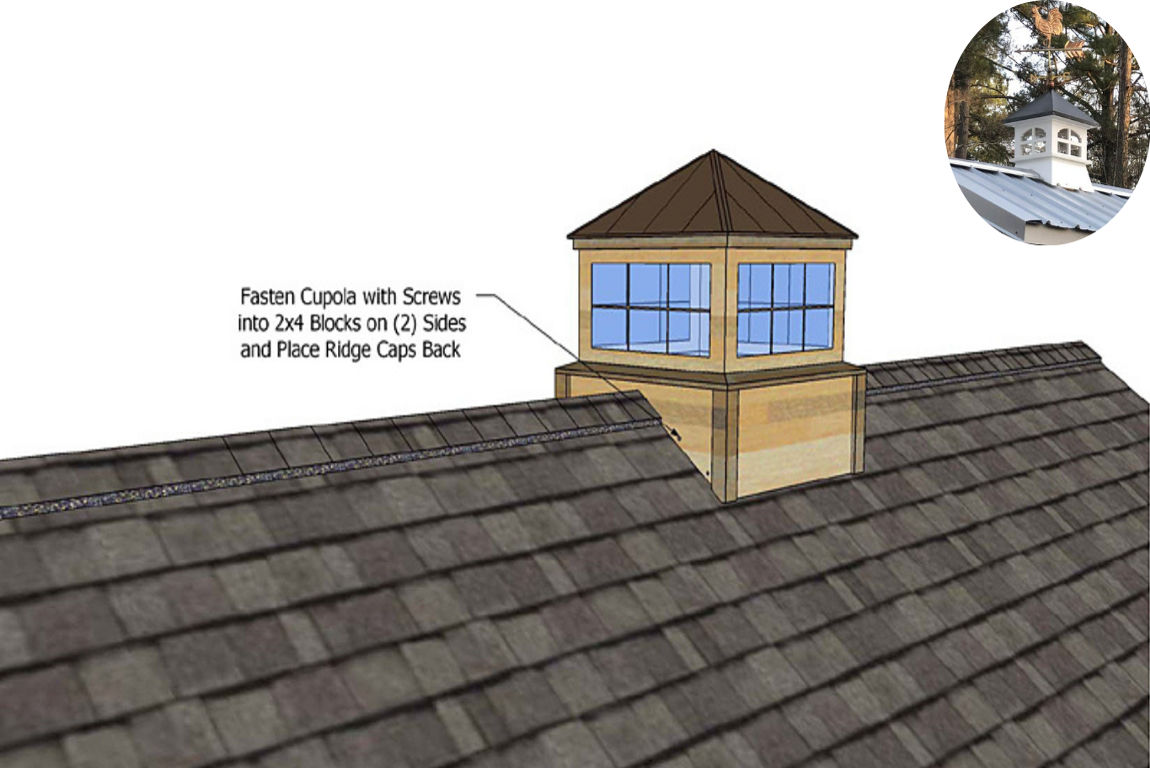
- Add the Roof: Fasten the decorative roof to the midsection, tightening screws to secure it firmly.
For extra stability, use brackets or clamps during assembly.
Final Sealing and Weatherproofing
Proper sealing ensures your cupola withstands the elements for years to come.
Applying Roofing Sealant
Use silicone caulk or roofing sealant on:
- All exposed screw heads
- Seams where materials meet
Creating Drainage Gaps
Leave small gaps at the lower edges of the cupola to allow water to drain. This prevents pooling and reduces the risk of leaks.
Finishing with Ridge Caps
Reinstall ridge caps or vents over the cupola’s flashing to integrate the structure seamlessly into your roof.
Benefits of a Properly Mounted Cupola on a Metal Roof
Installing a cupola offers more than just visual improvements. Here are some key benefits:
FeatureBenefit
Ventilation Improves airflow, reducing heat and moisture buildup.
Aesthetic Enhancement Adds timeless charm and curb appeal.
Weather Durability Prevents leaks and enhances roof longevity.
Troubleshooting and Maintenance Tips
Even with a perfect installation, regular maintenance ensures your cupola remains in top condition.
Common Mistakes to Avoid
- Improper Sealing: Leads to leaks and water damage.
- Weak Base Attachment: Results in instability during high winds.
Maintenance Checklist
- Inspect flashing and seals annually for wear or damage.
- Clear debris from the louvres to maintain proper airflow.
- Tighten screws and fasteners as needed.
You may also read (unlocking the secrets of house roof framing).