
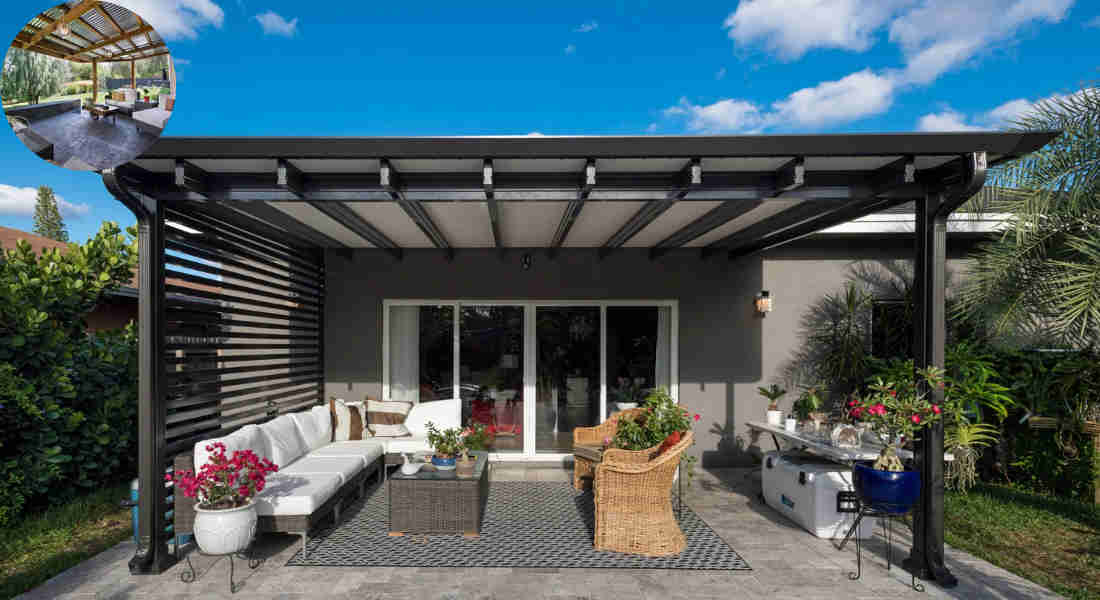
Building a metal roof for your home’s covered patio is an exciting project that brings numerous benefits. Not only does it enhance the aesthetic appeal of your home, but it also provides durability, weather resistance, and low maintenance. Metal roofs can withstand harsh weather conditions, making them a wise choice for homeowners seeking to add a functional outdoor space.
From planning and materials to installation and maintenance, we’ll break down each step in detail, ensuring you have the confidence to take on this project.
Planning Your Metal Roof Covered Patio
Importance of Thorough Planning
Before you grab your tools, it’s essential to start with a solid plan. Planning is crucial in ensuring that your project runs smoothly. Consider what you want from your patio—whether it’s a cozy spot for family gatherings or a shaded area for relaxation.
Choosing the Right Size and Shape
Next, think about the size and shape of your patio. Measure the area where you want to build, and decide how large you want the covered space to be. A larger patio may require more materials and structural support, so keep this in mind.
Assessing Placement
The placement of your patio about your home and landscaping is another vital aspect. Consider the direction of sunlight and wind, as well as how the patio will fit with your existing landscape.
Budget Considerations
Budgeting is key. Create a list of materials you’ll need, and research their costs to ensure you stay within your financial limits. It’s wise to include a buffer for unexpected expenses that may arise during the construction process.
Overview of Local Building Codes
Lastly, don’t forget to check your local building codes and obtain the necessary permits. Some areas have specific regulations regarding patio structures, so ensure you’re compliant to avoid any legal issues.
Materials and Tools Needed
Essential Materials
Below is a list of essential materials you will need to build your metal roof-covered patio:
- Metal roofing panels
- Support posts (wood or metal)
- Beams
- Roofing screws
- Flashing
- Underlayment (felt or synthetic)
- Drip edge
- Ridge caps
Recommended Tools
You will also need the following tools for the installation:
- Post-hole digger
- Drill
- Saw
- Level
- Measuring tape
- Framing nailer
- Metal shear
You may also read (does roof color really affect house temperature in celsius).
Tips for Choosing Quality Materials
When selecting materials, look for quality options that offer longevity and weather resistance. This investment pays off in the long run by minimizing maintenance and repair costs.
Building the Support Structure
Step-by-Step Instructions
- Digging Post Holes: Start by marking the locations of your support posts. Use a post-hole digger to create holes that are deep enough for stability, typically about 2 feet.
- Setting Posts in Concrete: Place your posts in the holes and fill them with concrete. Ensure the concrete is level. This step is crucial for a sturdy structure.
- Ensuring Posts are Plumb: Use a carpenter’s level to make sure each post is plumb (vertically straight) and evenly spaced. This ensures the framework will be solid and stable.
- Attaching Horizontal Beams: Secure horizontal beams to the posts using galvanized hardware. This will create the framework for your roof.
- Adding Bracing: For extra stability, especially in high-wind areas, add cross bracing or triangular wood bracing.
Importance of a Strong Frame
A strong frame is the backbone of your patio roof. It not only supports the metal panels but also enhances the overall structural durability.
Pro Tips for a Square and Level Structure
- Use a measuring tape to double-check the dimensions.
- Regularly check using a level to ensure everything is aligned.
- If possible, have a friend help you; an extra set of hands can make a big difference!
Preparing for Metal Roof Installation
Deciding on Roof Decking
Depending on the type of metal panels you’ve chosen and local codes, you may need roof decking. This can be OSB (oriented strand board) or plywood, which creates a smooth surface for installation.
Installing Roof Decking
If required, lay down the decking securely, ensuring there are no gaps between the boards. This surface is crucial for preventing moisture accumulation.
Installing Drip Edges
Install drip edges along the eaves to direct water away from your structure. This small detail can save you from potential damage down the line.
Laying Down Underlayment
Add an underlayment (felt paper or synthetic) over the decking if applicable. Ensure that the edges overlap correctly for optimal moisture protection.
Using Roof Cement
For extra leak protection, apply clear-drying roof cement around the edges and any penetrations. This step helps seal potential entry points for water.
Installing the Metal Roof Panels
Starting Panel Placement
Begin installing the metal panels starting from the bottom edge of the patio roof frame. This ensures any water will flow off the roof instead of getting trapped.
Proper Overlapping
Ensure panels overlap correctly according to manufacturer instructions to prevent leaks. This is a crucial step for maintaining the integrity of your roof.
Fastening Panels
Use roofing screws with rubber washers to fasten the panels. This helps prevent water from seeping through screw holes. Be sure to follow the manufacturer’s guidelines regarding screw placement and tightening.
Cutting and Trimming Panels
Cut and trim panels as needed to fit the dimensions of your patio. Use a metal shear for clean cuts.
Installing Ridge Caps
Install ridge caps along the roof peak to ensure a watertight seal. This is another crucial step in preventing leaks.
You may also read (what is the best route to home kew garden).
Adding Flashing
Install flashing where the metal roof meets the house wall. Finish the installation by adding fascia boards and trim.
Common Mistakes to Avoid
- Skipping the underlayment: Always ensure moisture protection.
- Incorrect screw placement: Follow guidelines to prevent leaks.
- Neglecting to check alignment: Regularly check for level and square throughout the installation.
Ventilation and Drainage Considerations
Importance of Ventilation
A ventilation gap (minimum of ½ inch) under the metal roof is vital to prevent moisture buildup. This gap allows air to circulate, reducing the risk of mold and mildew.
Designing Proper Drainage
Ensure proper drainage by designing roof overhangs that are properly sloped. A 1-foot overhang is recommended to direct water away from the structure effectively.
Installing Gutters
Consider installing gutters to manage water runoff. This prevents water from pooling around the foundation of your home, ensuring its longevity.
Finishing Touches and Aesthetic Enhancements
Painting or Staining Support Structures
To protect against the elements and improve aesthetics, consider painting or staining your support posts and beams. Choose weather-resistant products for longevity.
Adding Outdoor Lighting Fixtures
Incorporate outdoor lighting fixtures that are compatible with metal roofing. This adds ambiance and enhances usability for evening gatherings.
Decorative Trim
Add decorative trim and fascia boards for a polished look. This can elevate the overall design of your patio.
Suggestions for Patio Furniture
Think about patio furniture and décor that will complement your new metal roof. Choose weather-resistant materials that will last through the seasons.
Maintenance Tips for Longevity
Regular Inspections
Make it a habit to regularly inspect screws, flashing, and panels for any damage or loosening. Early detection can prevent larger problems down the line.
Cleaning and Checking for Rust
Keep the roof clean by removing debris and checking for rust spots or corrosion. A clean roof not only looks better but also lasts longer.
Seasonal Checks
Perform seasonal checks to ensure drainage and ventilation are adequate. This will help maintain the integrity of your patio roof.
You may also read (5 essential tools for shingling a hip house roof).